
This is it, the final part of the Necron How To, with a special on the glow effect, or as it is also called - the Object Source Lighting (OSL) effect. It can be used in various ways and forms to add some fancy visuals to a miniature. Be it Space Marine eye lenses, glowing Tau rifles, flashing headlights on a tank - there's really no limit. The best part about it, though - it's not that hard to pull off, at all.
So, how's it done? As you might have seen in my last How To, I had prepared the areas for the OSL effect with a light grey basecoat. Light grey, because it's easier to paint than a pure white - which doesn't matter if you prime your minis white, anyways. But in the case of the 'crons, I advise against that. Metals always look weird on a white undercoat.
OSL Step 1:
Mix some green-yellowish paint (in my case a mixture of P3 Necrotite Green and some old GW Sunburst Yellow in a 80/20 ratio) and thin it down. A lot. You want the colour to be watered down so much, that it's runny and will have only very few colour pigments in it. My approach to this is to put several drops of water on my pallete, until I have a small puddle and then add 2 drops of colour. Then carefully apply the mix to the areas supposed to glow later on. Don't let the colours pool too much, or you'll end up with colour stains where you don't want them. Also drag the water away from the middle of your glowing area. It is supposed to be the brightest spot. Don't worry about getting the thinned down mix on the surrounding areas - as a matter of fact, we want it to spill onto them. At least for a bit. Let the colour dry after you've applied it. The same goes for all subsequent steps.

 |
| As you can see, there'll be only minor colouring of the areas during step 1 |
Step 2 is pretty easy. It's rinse and repeat. Add a tiny bit more of the green to your thinned down mixture, then apply it the same way you did in step one, focusing more on the areas toward the edges of your glowing parts. Stay away from the centers. Carefully apply some of the mix on the edges adjacent to the glowing areas. In this case it will be part of the shoulder guards, the upper edges of the black leg armour and the like. Also keep in mind, that most edges will catch more of the reflected light than smooth areas.

 |
| Tune it up a notch! |
OSL Step 3:
By now, maybe you might have guessed how we are going to proceed. We add a drop more of the green to the mix and take care of all the outer thirds of the glowing parts and gently use the mix on more of the surrounding armor parts. In case you are not painting Necrons, but maybe Space Marine eye lenses, use your armour's highlight colour and paint a thin line on the rim where armour meets lense. Then use your watery colour on that. The edge will look like it's reflecting most of the light, which it would in the real world. But to finish Step 3, now take some off white colour (P3 Menoth White Highllight, GW Bleached Bone) and add it to your watery mix. Not just one drop, but a few, like 3 or 4. You will get a different state of colour, less fluid. Carefully use it to paint sort of a dot in the middle of your glowing areas. It will serve as a center highlight and add to the effect, that the part is glowing from it's center.

 |
| They glow in the dark! |
That's the basics of OSL, really. It's important to add colour to all the surrounding and adjacent areas on the mini which would reflect the light, to create a believable effect. But don't overdo it. As with most things, less is more. In case you are wondering how the guns are supposed to look, here's a couple of images of them:


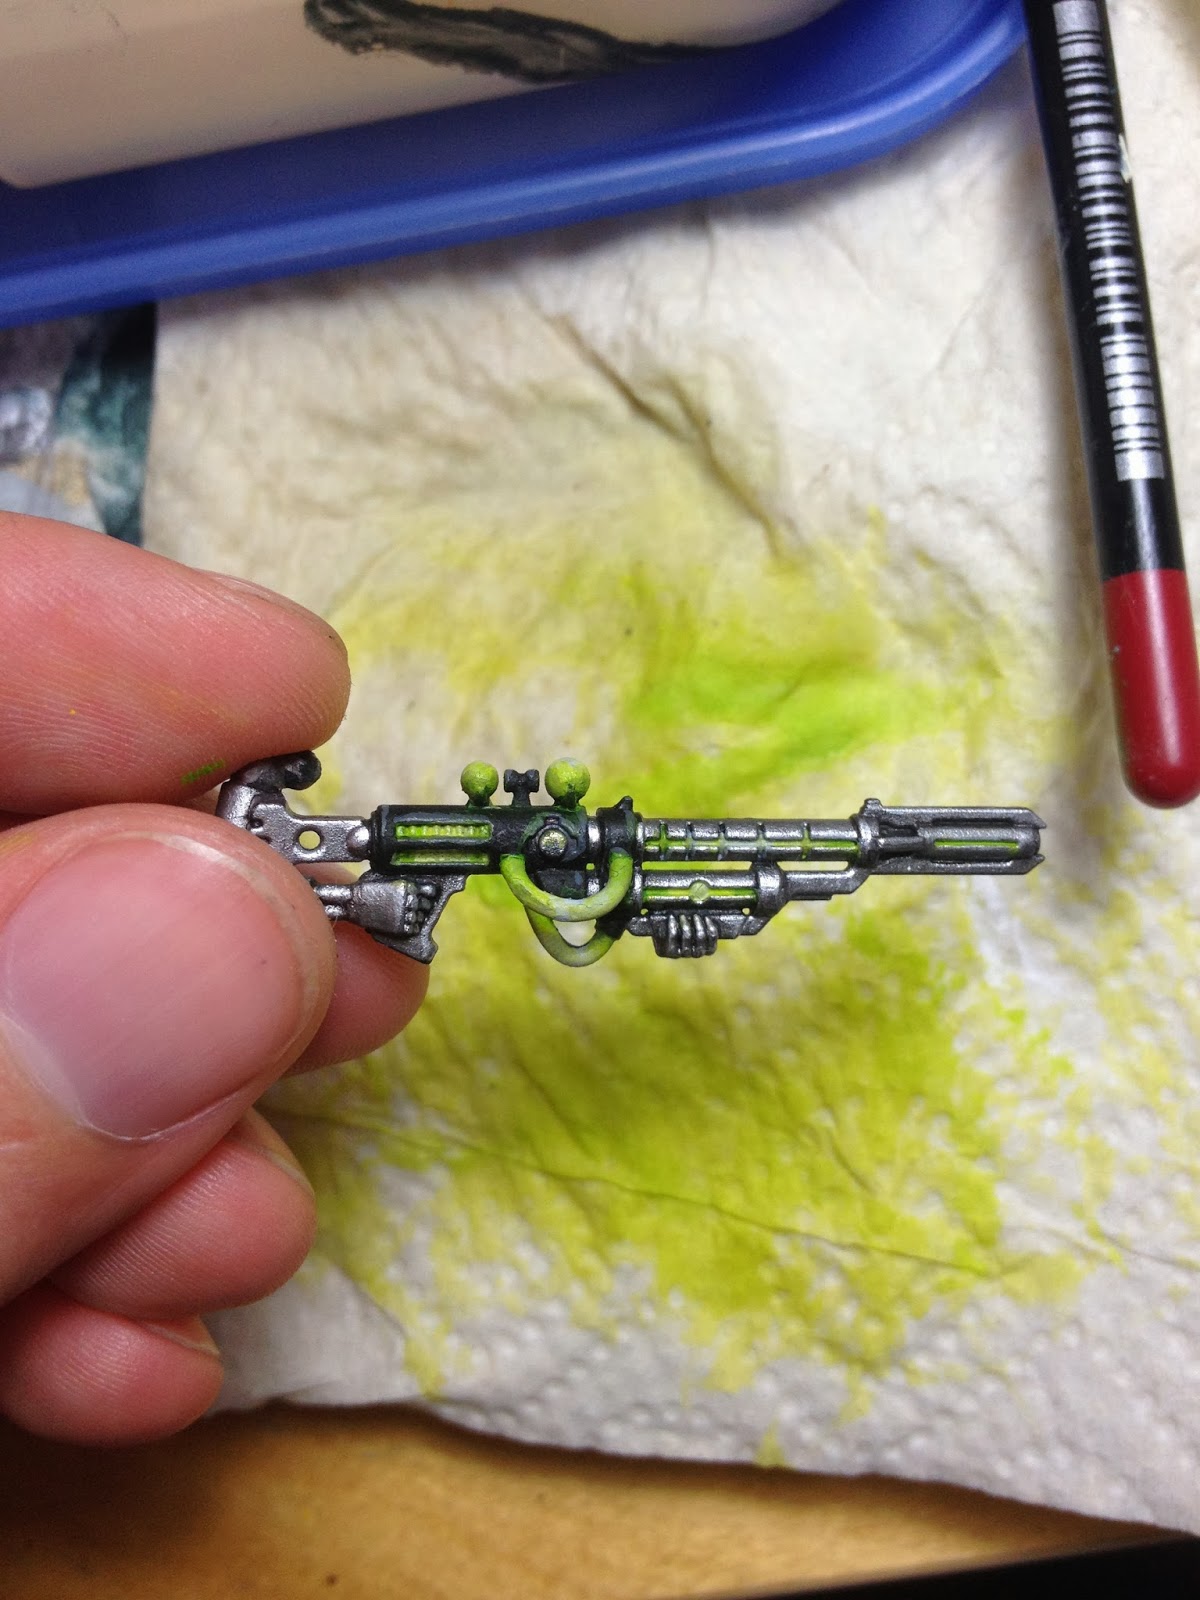
And finally, here they are, the Deathmarks in their finished glory. I think, their owner was quite happy with how they turned out.


I hope you enjoyed this How To and also hope, that my explanations on how to make things glow were understandable. If not, don't hesitate to ask, I'll be happy to help. Feel free to leave some feedback, comments, critique in the comments below.
Cheers,
Kenza
No comments:
Post a Comment